Friday 30 April 2010

TONY CIPRIANO: THE DUKE OF DUST - PART 1 of 3


I’ve been thinking about how to introduce my friend, Tony Cipriano. I’d thought about extolling his virtues as an artist. I’d considered mentioning his genuineness. His down to earth, easy-going, joyful spirit. Maybe touch on his steadfastness as a friend, his loyalty and integrity. I could have opened with his compassion; he is a true blue dog lover and a man on intimate terms with Mother Nature. (Its okay, his wife knows). His devotion to old TV shows and classic movies, in particular, horror movies that open with a miniature plane circling a rotating globe. A die hard Beatles fan and the only other guy I know who listens to the Beau Hunks and their impeccable renditions of music from Laurel and Hardy and Little Rascal films. But, I suppose it makes more sense here, to discuss Tony, the sculptor. There ain’t nothing Tony can’t sculpt. He thinks with his fingers. He doesn’t over analyze, doesn’t get bogged down in minutia. He sculpts until its right and when it is, and he’s done and moves on to the next piece. He’s not as well known as he should be. If reputation were a direct result of talent, Tony would have his own network prime-time TV show. But he’s a terrible self-promoter. He’s more concerned about maintaining a good relationship with his clients and the quality of his work. Help us spread the word about our reluctant star. Ladies and Germs, the first of a three-parter, Its my pleasure to introduce, Tony” here’s another fine mess you’ve gotten me into” Cipriano. - Tim Bruckner

So Tim asked me to 'blog' with him. At first, I thought it was a tropical drink. Or maybe some kinky activity left over from his 'free love' days. So I did a little research and found out that this 'blogging' is all the rage with the kids today. Apparently they like to ‘tweet’ each other, too. To each his own. But, since I owe much to these grand old men--Procopio and Bruckner--I had to give it a whirl. I've decided to show my twisted, convoluted approach to a statue from 'soup to nuts'. I don't know too many other sculptors who are dumb enough to bake a Sculpey sculpture 20+ times along the way... and have clay dust an inch thick on the studio floor and shelves, not to mention on me. My wife calls me 'Pigpen', from the Peanuts cartoons...only my dust cloud is pink. (make your own jokes). Along the way, I'll go through several different materials, a dozen tubes of super glue, found objects, waste expensive silicone, and typically burn myself with boiling wax or slice off a fingertip or two. In short, I can't, in good conscience, recommend you follow my process…but maybe a tidbit here and a snippet there will apply for you. I hope you will take some useful info from this essay, but please save your laughter till I've left the building? Deal?

The sculptures I will be chronicling for this entry are the GAMBIT Premium Format Figure, and the SILVER SURFER Comiquette produced by Sideshow Collectibles. These are two recent projects and I worked on them simultaneously. SS's 'Premium Format' line consists of larger, 1/4 scale figures...mostly sculpted, but having some type of mixed media element added...like leather, fabric, etc. In Gambit's case, it was decided to sculpt most of his body, and add a 'real' trench coat. The SURFER, also 1/4 scale, is fully sculpted.

When I am initially contacted to begin a project, either the client will present me with an initial concept sketch, or ask me to draw one. Sometimes we will brainstorm on the phone, but in both of these cases, the client had a specific pose in mind. With Gambit, I was sent some existing artwork for inspiration..... and for Surfer, they sent me some JPEGs of a model ( my art director!) in the pose they wanted. ( FIG. 1) Most producers do not go the extra mile like this. It really makes my job easier. Using the photos of the model, I did a small drawing of the proposed statue from 2 angles. This was used to show to the licensor ( Marvel, in this case) and get a green light before we began sculpting. (FIG. 2)

Once the concept sketch was approved, and the OK was given to proceed, I decided that it might be a good idea to work out some of the kinks on Silver Surfer in a small, oil clay maquette. Gambit was a straight forward, standing pose, but Surfer was to be on a 22 inch surfboard... banking into a turn... with trails of 'cosmic dust' behind him and supporting the 18 inch figure. So, I made a quick 1/8th scale model. ( FIG. 3) Once I began work on the larger version, this little 'study model' would eliminate all the guess work, making the project go much faster. This figure is only about 8 inches whereas the actual product will be an 18 inch figure.

For these 18-inch figures, I am using 1/4 inch armature wire. I like it because it is firm enough to hold up my figures, but it is a pain in the neck to cut through later. I suppose a more organized sculptor can plan ahead for cutting up a figure, but as I say....LAZY. I'm working in Super Sculpey. I had some gray for Gambit, but frankly I prefer the softer pink. The gray is harder, drier & takes detail better, but the pink is faster to work. Here is the Gambit figure blocked with the gray ( FIG. 4 ) I squeeze my clay on fast....pushing, scraping with the loop tool....raking...mashing. My first and foremost concern at this stage is that pose. I want it to be dynamic even if the figure is simply standing upright. You'd be surprised at how much of a difference even the slightest head tilt, shoulder dip, or finger bend can make. Even as rough as this is, it has already been baked several times to lock in the pose. You can see the light gray areas where I had to patch the cracks form the baking process. I've also used my grinding tool to actually 'sculpt' some forms. I use a barrel/drum bit on my Dremel, to sand the figure and break it down into planes. This may be my favorite part of the entire process. I can already tell at this point if I have a successful pose or not. Many times, I break the limbs and re-position them, using Magic Sculpt Epoxy.

I love this stage, because I'm not noodling it...I'm not worried about the tiny details yet. I can just sand, grind, slap clay on. I think it is the promise of what is to come that excites me. In other words, I haven't screwed it up yet! : )


Here is the first pass on the Surfer. ( FIG. 5) This is a little bit further along from the 'Dremel' stage. I have begun to add anatomy. Notice the light gray areas. This is Magic Sculpt epoxy, used to putty cracks and add keys to the arms & legs, which have already been separated for molding.


Another round on Gambit. I've begun to add some anatomy to his chest, separated the parts, and begun to actually draw with pencil where the costume details will go. The staff is only a wood dowel, but later will be replaced with brass stock. This statue comes with 2 alternate heads...one depicting the classic look, and one with the more modern incarnation of the character. ( FIG. 6) You can see how much I rely on the epoxy putty in the early stages. This is mostly due to the cracking that occurs with baking the Sculpey so many times. I know some sculptors will use a heat gun to cure small areas, but I never like to use a heat gun. It cures things unevenly and sometimes burns it. This is also why I like to separate the different components early on; I can bake parts while I continue to work on other parts of the sculpture. ( FIG. 7)


And another round on Surfer. ( FIG. 8 ) Since the last pass, I have sanded and primed the figure and continued work on the cosmic dust trail. The middle image shows a quick Photoshop area where I was showing the client what I planned to do to the dust. The client wisely requested that I raise the tip of the surfboard upwards. I think it made a huge difference. This is one of those things that happens when a sculptor works alone in his studio, and looks at the sculpture for days at a time. You begin to get 'tunnel vision'. It's extremely important to have art directors who know their stuff, take a look at the work many times along the way to catch things like this. Compare the difference to the earlier photos; much more dynamic & in keeping with the character. At this point the dust trail is just epoxy putty, stippled with tools.


In these shots (FIG. 9), you can see the new board. I cut 1/4 inch Masonite and carefully cut strips of thin styrene, gluing them down to the top and bottom.

Almanaque Bertrand, 1934 - Ridgewell, An understandable mix up

Click image for 881 x 680 size.

From the Punch:

I thought you said you were driving in your new car, Lionel.
So I did, aunt. There it is.
Oh dear, what a strange shape it has.

Thursday 29 April 2010

POP SCULPTURE: LET'S GO TO THE VIDEO

Here's your first look at a teaser video for Pop Sculpture, edited by Tim with narration by Thor, er, Zach.


Do you want to see more like this? Let us know!

POP SCULPTURE: A POST ABOUT POSTERS

Every now and then, we'll upload a digital promotion poster, just for the fun of it.  This is our first effort, designed by Tim and based on an old Gene Autry movie.

Almanaque Bertrand, 1934 - Ridgewell, An expedite maid

Click image for 1451 x 936 size.


Did I see the gentleman's suitcase? Yes I did! And I already put it in the taxi to save time!

Bad luck, sir! There goes the train!

Wednesday 28 April 2010

New silhouette 1929


Almanaque Bertrand, 1934 - The windows of taxi cabs

Click image for 958 x 1444 size.

From the Punch: there are three kinds of taxi cab windows. Those that are closed and can not be opened. Those that are open and can not be closed. Those that move perfectly.

Tuesday 27 April 2010

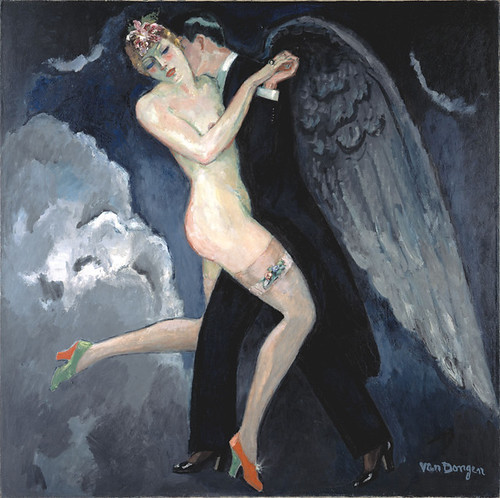
Kees van Dongen (1877-1968), Tango or Tango of the Archangel, 1922-1935


Monday 26 April 2010

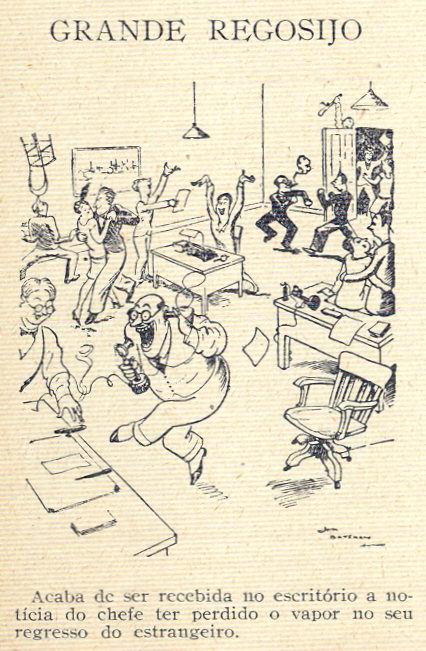
Almanaque Bertrand, 1934 - Great rejoicing

News hits the office that the boss missed the boat to return from his trip abroad.

Saturday 24 April 2010

The San Franciscan, July 1929 - cover


, originally uploaded by bobster855.

Almanaque Bertrand, 1934 - The power of descriptive music a 3

Click image for 1932 x 1449 size.

Friday 23 April 2010

Almanaque Bertrand, 1934 - Just as competent

Click image for 968 x 1442 size.

From the Punch:

The mother: Wouldn't you like to be able to paint like that, Charlie?
Charlie: Oh but I am, mom. You know I am.
Thursday 22 April 2010

POP GOES ATHENA

On October 6, the end result of two years' work will arrive in bookstores. But what the heck is it? Simply put, it's a start-to-finish instruction manual for creating prototypes, molds and paint masters for a 3-D sculpture headed for mass-production. While we show a bunch of different pieces in the book, in different stages of completion, we needed to create one piece on which we could demonstrate the various techniques we were about to teach. Since Tim, Ruben and I were emptying the contents of our skulls to benefit aspiring sculptors and curious collectors around the world, we figured, why not choose a character who sprang fully-formed from someone else's skull? And so Athena, the Greek goddess of wisdom, became our willing test subject. Here, you can see glimpses of her representing the many steps of the process. - Zach Oat


1: Rough clay. Playing with position and proportion on a mock-up base.


2: Finished clay ready for Waste Mold.


3: Finished clay head.


4: Clay head part cut from figure and gated for waste mold.


5: Waste mold cut and clay part removed.


6: Collection of wax cast part from waste molds


7: Working wax toward finish


8: Finished wax head for Athena statue.


9: Cleaning resin cast for Paint Master.


10: Primed resin cast. Paint Master started.


11: Finished Paint Master of Athena head.

Wednesday 21 April 2010

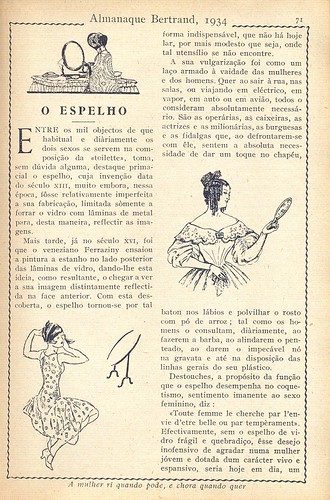
Almanaque Bertrand, 1934 - The Mirror

Click image for 952 x 1444 size.

Almanaque Bertrand, 1934 - illustration 1

Click image for 804 x 544 size.

Monday 19 April 2010

Almanaque Bertrand, 1934 - cover by Roberto

Click image for 1028 x 1520 size.

Almanaque Bertrand, 1934 - The hunter and the ostrich

Click image for 933 x 1440 size.

Sunday 18 April 2010

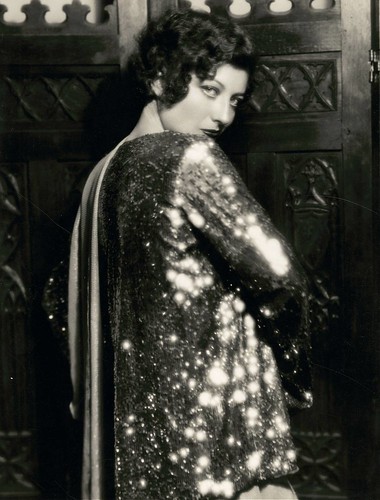
Ruth Harriet Louise, Joan Crawford


Friday 16 April 2010

JONATHAN MATTHEWS: ADDING DIMENSION TO 2-D ART

My work at DC has included a little of everything, from statues to action figures... both from my own stylings and from specific comic artists' styles. I think some of my most successful pieces, from both fan reaction and personal gratification, are the ones I've sculpted to capture a comic artist's two-dimensional style in three dimensions. I loved working in Mike Mignola's style, and, judging from the pricing on eBay, the Batman Black and White statue I did from Mignola's art is a fan-favorite. ...Of course, that could have to do with low production runs. I'll tell myself it's fan popularity, though. Makes me feel better.

This particular Batman piece was pretty challenging. Mignola's artwork is highly and wonderfully stylized. It looks great on the page… it also happens to be difficult to translate into three dimensions. I'll assume Rubén had the same difficulty (and similar success... love the Lobster Johnson statue, Procopio!) in rendering shapes that don't necessarily belong in the three-dimensional world. I had to cheat angles, add planes where they wouldn't normally work, and generally throw all the knowledge I have of three-dimensional realistic anatomy out the window. The result in painted prototype form is a statue that reads as two-dimensional. Granted, I painted differing light and dark areas onto the statue to enhance the effect, but I remember reading forums where collectors honestly didn't believe the statue was anything more than a cardboard stand-in for what would be the final piece of sculpture. Pretty funny, actually.

I've also had the honor of working with Darwyn Cooke on the New Frontier action figures. I remember beginning the project and being introduced via email to Mr. Cooke; he forewarned me that he's a bear to work with. I've worked with some prima donnas in my time, so I assume if the guy's telling me he's hard to work with it, can't possibly be anything but a nightmare. I'm expecting revision after revision, mid-progress changes, the works. It turned out he was one of the easiest artists to please that I've ever worked with. A true professional. He gave my art directors beautiful and fully realized turnaround artwork for the figures, plus we had his whole New Frontier graphic novel to pull from for stylistic reference. Mr. Cooke was well pleased with the result, and I was honored again to be thanked for the effort in the "Absolute" edition of New Frontier.

Finally, I did action figures of the New Gods, based on master comic artist Jack Kirby. This was a similar challenge to the one I faced with Mignola -- a whole lot of artistic license is taken to get the effect Kirby wanted on the page. So, tear out the first chapter in realistic anatomy. No smooth transition from one muscle group to the other, and how the @#$% do you translate all that ultra-bold ink work into three dimensions? Unfortunately, Mr. Kirby wasn't around to help us nail down the style, but we did the best we could, and I was pleased with the result.

Cheers,

Jonathan Matthews
www.matthewsculptor.com
jonlmatthews@insightbb.com

Almanaque Bertrand, 1934

Click image for 1032 x 746 size.

- Does the sea agree with you, madam?
- It's done wonders for me! Already I have married off two of my daughters.

Wednesday 14 April 2010

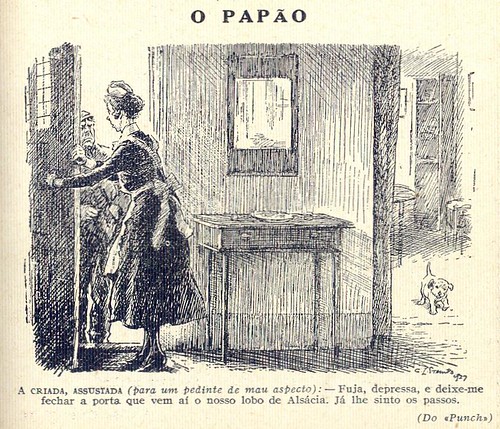
Almanaque Bertrand, 1934 - The boogy man

Click image for 840 x 721 size.

From the "Punch":
The maid, frightened by a mean looking begger:- Run away, quickly, and let me close the door. Our Alsacian Wolf is coming, I can feel his pawsteps.

Gladys Peto, The Spell, 1920s


Tuesday 13 April 2010

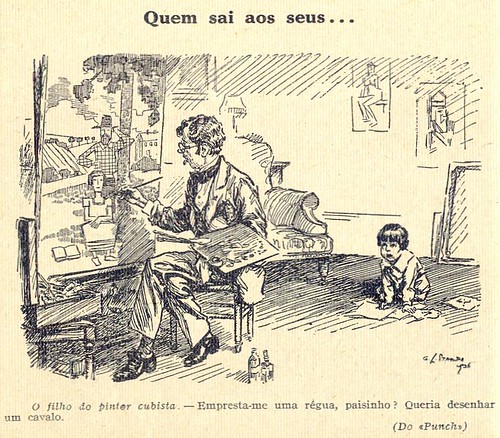
Almanaque Bertrand, 1934 - A chip off the old block

Click image for 843 x 739 size.

By Stampa, from the "Punch":
Son of a cubist painter. - Would you lend me a ruler, daddy? I'd like to draw a horse.

Monday 12 April 2010

Almanaque Bertrand, 1934 - Ancient Stories, header

Click image for 897 x 313 size.

Sunday 11 April 2010

Almanaque Bertrand, 1934 - African swing

Friday 9 April 2010

Almanaque Bertrand, 1934 - Metamorphosys 29

ALTERTON BIZARRE: EMPEROR OF EPOXY


I’ve never known anyone with more enthusiasm for sculpture and sculptors than Argentinean sculptor Alterton Bizarre. Alterton’s Sculptor’s Corner (http://www.thesculptorscorner.com) was the first online gallery I joined. Mr. Bizarre works in epoxy putty, the most unforgiving sculpture material known to modern man. You have to have the patience of Job, the work ethic of a stone mason and be fleet of hand and sure of eye to be able to beat the damn stuff into submission. He has all of that and a mode of expression that would make the entire crew of a pirate ship blush. In addition, he is a doctor of dentistry and orthodontics. But don’t call him Doc. He promises to “kick your fat ass” if you do. How he knows I have a fat ass, I don’t really know. None the less, ladies and germs, midgets and microbes, I give you, the one and only Alterton Bizarre! ~ Tim Bruckner

1: This was my first time working with this kind of control art. Mike Pavlovich did an awesome job creating the ZBrush file, and I was able to disassemble it in parts: shoulders, torso, head, etc. Having all the reference in 360 degrees meant I could examine the piece from every angle in detail. It was a big challenge, because there was no room for mistakes or “cheating” as everything was there, right in front of my eyes.
2: I started with a wire armature for pose and proportions and covered it with a fast-curing epoxy (5-10 min of working time) to get a rigid skeleton to work over. Then I used regular epoxy (45 min to an hour working time) to create the basic volumes and shapes. Once the epoxy was cured, I did some rotary tooling to compensate and accommodate the shapes.  

3: One of my biggest concerns was the relationship between the belly and the gun. So once the gun was sculpted, following the digital file, I positioned it in place to see how it would work.
4: As some volumes were tricky, having to leave room for details, I used polymer clay to add volume to the belly and the hunched back. This allowed me to be a little more specific in adding/removing material. After the polymer clay was baked, I added some epoxy layers covering the clay. Pete Jirles' directions were really helpful and easy to follow to accomplish these proportions. Next, I cut the piece into parts with a jeweler’s saw for molding and casting purposes.
5: It was working!!! It was time to start adding armor shapes and volumes, cleaning and reshaping with a rotary tool. It was a process of adding layers of regular epoxy, letting them set, tooling, new epoxy layers, letting them set and tooling again and so on and so on, until the desired result were achieved.
6: Details followed the same process of adding epoxy layers and tooling. I did one side first to see how it was working. Once the client was satisfied I continued with the other side. For the gun I used some styrene rods and sheets, using heat and shaping blades, and adding thin layers of epoxy. And lots of filing and heaps of sandpaper to get those damned sharp edges!!
7-8: To give a final smooth surface, I sprayed gray automobile primer in several layers, being very carefully not to smooth out the details, but enough to give a unified look and a continuous polished surface. The first layers of primer allowed me to see which parts needed more sanding and refining. Again, it was a process of spraying primer and sanding, spraying and sanding, until I was happy with it. Finally the piece was ready for approval!!!! I took a set of turnaround pix and some close-ups and sent them to my Art Director for approval, and from there straight to Epic Games for final approval. Luckily, the approval process was one of the fastest I ever had!!!! Epic didn’t ask for modifications, so my AD was happy and I was even happier. After a month and a few days, I had finished one of the most intricate and detailed pieces I’d ever done.
9: The base was sculpted by Peter Jirles, who sculpted the bases for the other figures in the series. The final product was done in cold-cast platinum and cold cast bronze, which really heightened the sculpture’s details.